Friday, February 13, 2015

Last Minute Valentine's Gift: Gold Thumbtack Art

Hi! You know when you envision something in your head and than you try it and it turns out nothing like you thought it would? This is complete opposite. :)  I had this idea for some time but I thought for sure it wouldn't work out the way I wanted it to. But, it did! And it's so easy! I am so happy to share this with you today! Just in time for Valentine's Day! This would be great as a last minute gift idea but it's also just cute- You know my love for gold... Make one for your home, change the words or use silver thumbtacts! It's very versatile! Also, inexpensive.


What you need:
Canvas (I used 2 8X10 inexpensive ones)
Bought them in Michaels, the craft store, and they were on sale for $5 for 2. If they are not on sale, make sure to use the 40% coupon on your phone! 

2 Boxes Gold thumbtacks (from the Dollar Tree!) $2

For the LOVE sign:
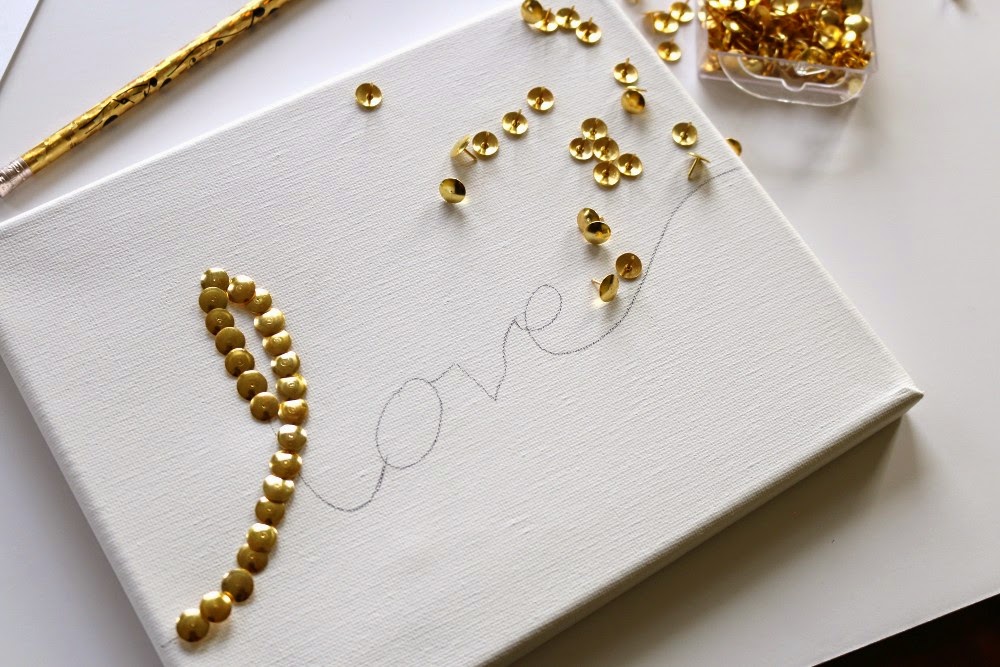
First, freestyle your word of choice on your canvas using pencil. I practiced a bit before drawing on the canvas. You can also do some web searching to mimic a font you like. Cursive is much easier to do than straight font because getting the thumbtacks straight is rather tricky. But I love the idea of a thick uppercase LOVE print-(like THIS! my absolute favorite) if you have the courage to try!


Than start tacking away, putting in tacks the way you would write the word and going with the flow. The ends are not easy to get in (because of the wood frame backing) but with some pressure and a little hammer, it turns out fine!)


The heart:
Since I had another canvas, I decided to try a heart. This was a bit more time consuming but still worth it! If i could redo it I would pick a smaller heart. The wood edge was tough to get through to create a cohesive flow!
First, print off a template. Trace and start tacking. I started at the bottom and went in rows, from left to right. The most important thing is to keep a straight line. If you press a thumbtact in too high or low, just take it out and redo it. The "mess-ups" won't be visible! It also helps to draw some lines at the bottom to guide you. I overlapped the tacts, having a more scale-ly affect. This also helped cover up imperfections.


And that's it!  Enjoy!


 What words or shapes would you try?

Happy Valentine's Day to you all! It's such a beautiful day to speak love to those around you!

Love, 
Viktoria

Tuesday, February 10, 2015

Chopping a Dress into a Skirt

Hello Hello!


I think its confession time: I bought this dress because of the print. It DID NOT look good on me in the dressing room and after many years and efforts of styling it, it still did not look good. The problem was the shape of the dress. It was a weird bag shape (and no, not in the chic, effortless way people are wearing bags these days) ;) Plus, every single time I put it on, my husband made a face and would say something that always had the word "bathrobe" in it. Haha. My husband is NOT picky about what I wear. He usually tells me I look beautiful (wise man) but this dress was his limit.

Too attached to the print to give the dress away, I thought I'd cut it in half and make it into a skirt. I have worn it more times this way than I ever did when it was in a dress form. I know I know, you can wear your dresses as skirt by just wearing them under shirts but because the top of this dress was so weird, I couldn't do that...  If your dress can be layered, keep it the way it is. But if it just does not work and you absolutely hate how it looks on you, I say chop it. :)

This is the super easy way without adding a waistband:

1. Cut. (Keep in mind you are folding down the top for the elastic, so the skirt will get a bit shorter)

2. Turn inside out and fold over the top of your "skirt" the width of your elastic. Iron and pin all the way around.

3. Sew around, using matching thread but leave a small opening. (Usually at the side)

4. Measure the elastic around your natural waist (or where you want the skirt to sit) and add an inch. Thread it through the sewn hole (Using a paperclip or saftey pin).

5. (not pictured) Sew both ends of the elastic together. Close hole shut by hand sewing or running it through the sewing machine.

DONE!

(Note: My skirt still shifted around a little since I didn't make a separate waistband but it doesn't bother me. But here is a great tutorial By Merricks Art (Scroll to bottom!) on how to sew a waistband and make your skirt feel more secure)


What do you think? Did I make the right decision to cut??

Have a beautiful week! Until next time :)

With Love,

Viktoria