Friday, April 28, 2017

Crop Top Shirt Refashion: Drawstrings

Hello lovelies! and Happy Friday!

What better way to start the weekend then to make something new for yourself? Especially an easy refashion like this that is super stress-free and can be done in less than an hour. I am sure you have the perfect top for it too.

We went on a weekend away with the kids and it was the perfect chance to wear this top. I have also been more aware of the damage the sun can do to your skin and try to have a more covered up cover-up for when it feels just too hot out. Button up's have become my favorite beach wear!

I bought this button down from a thrift store (it is a Target brand) a few years ago because: stripes.. haha. But it wasn't really great on me. It was a bit too short and a bit too snug for a button down. It didn't have the laid back fit I like. I was so inspired by a photo while online shopping (This is the top!) that my mind immediately thought of that button down shirt I still had in my closet. It is moments like these that I applaud myself for hoarding all my old clothes. :)

If you don't have enough left over fabric to make a drawstring- don't worry! Use a piece of ribbon like this beautiful blouse from Zara. 


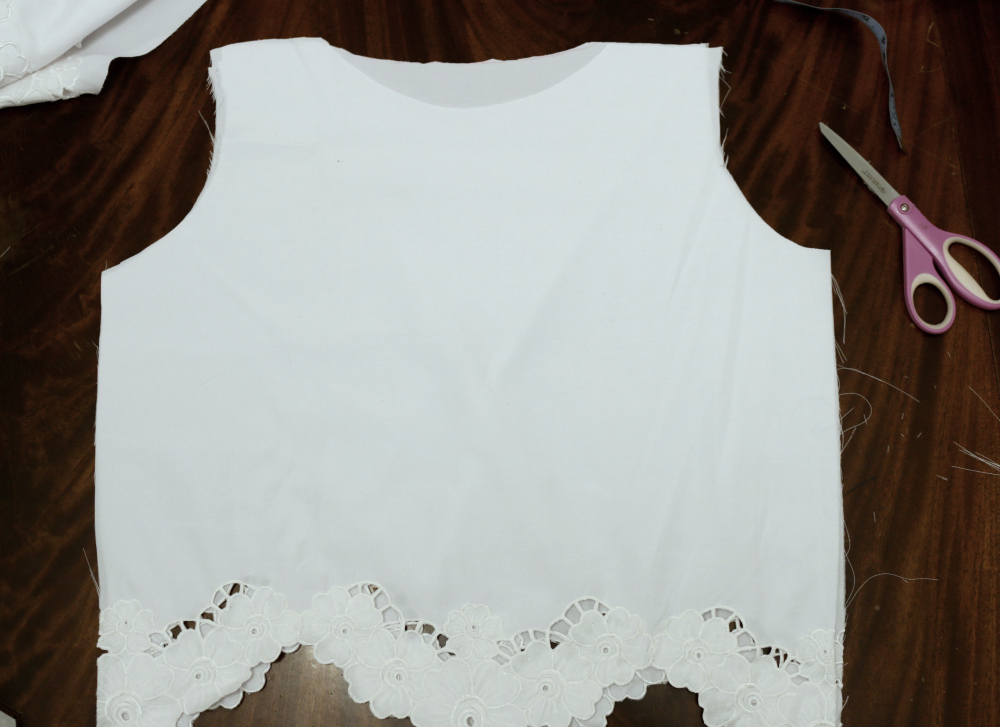
Look how easy it was to make this shirt into a cropped top and add drawstrings!


 1. Try on and mark where you want the shirt to end- add an inch or two to that for your "hem"

 2. Using the pieces you have left, cut strips of equal width. I was able to do two strips.

 3. Fold over the strips in half and pin down. Sew along the line.

4. (Not pictured) Turn the sewn strips right side out - to hide the seam. I use a safety pin pinned to the edge and just start shoving it into the hole. Sew together the two strips to make one long one.


5. Pin up the bottom of your shirt- make it large enough to thread your drawstring through. Sew along the pins.

6. Thread your drawstring through. You are done!
 
Wear with your favorite high-waisted white jeans or with a one piece at the pool or with a flowy maxi skirt. Think of it over a dress! SO MANY OPTIONS!!! Enjoy!


If you'd rather buy one, I found these great options! This one is reasonably priced with a similar feel
and this one is embroidered! And how beachy and gorgeous is this one?? 

Would love to hear from you! Will you make this?? Thank you so much for reading!

With Love,

Viktoria

Tuesday, February 21, 2017

Perfect Spring Top from Tablecloth


Yes: you read that title correctly! While looking through some cabinets- trying to downsize my overstock of everything, I noticed the trim edging of this tablecloth I almost tossed into the donation pile. We received it as a gift but it was never my style. The trim spoke to me! I have been imagining a dreamy white top with pretty trim for some time now! (Like THIS one or THIS one) So I thought I'd just try and make it out of the tablecloth. I felt like Scarlett O'Hara to say the least. ;)

If you happen to come across such a lucky fabric find, you can make yourself a perfect Spring Top too!

1. Using a (boxy) top as a pattern, lay it on the fabric that has been folded so it's double layered. I cut the arm holes a bit bigger then my pattern shirt just because I liked the idea of it being more roomy. If you have pretty trim on the bottom, line up the pattern and make sure you cut in the same place on both fabrics. Also be mindful of how much you leave. (i.e. I liked the idea of the pattern to seem continuous around the bottom of the shirt.)


2. Sew the top shoulder part together, laying the fabric right sides together and sewing the wrong side. 


3. Using another pattern for the sleeve, cut out two sleeves. (I had a dissected sleeve for this part. Or you can buy the sleeve pattern in the store. I recommend finding an old shirt you don't need to use as a pattern or buying a pattern. Sleeve shapes are weird!) Since I was making a long sleeve, I also was mindful of the pretty trim around the sleeve. I left the bottom opening 24' and it created a big bell-like sleeve.

Open your two attached body pieces and slide your sleeve up to the opening. Pin around, wrong side up to wrong side up. Sew this nice and slow. It will have an awkward curve.

Repeat to other "arm hole"


4. While still inside out, sew down the side of shirt and sleeve to close off your shirt.


5. Now for the neckline, Cut two strips about 3 inches thick of your same fabric. Using your neckline as a template, arch one more for the front neckline and the back one less arched. Pin around the top of the neckline- this time with the shirt right side out. (Make sure you are marking with washable pencil :)


6. Flip the flaps into the shirt and iron down. Sew around the top as straight and uniform as possible, creating a pretty edge. Pin to insure it stays put..


7. Iron your finished top!! DONE!


I LOVE how it turned out! And love my sweet husband that took his time to take these pics of me. :)  Love you babe.

With love,

Viktoria