Tuesday, September 25, 2012

Muted Moroccan: Shades of Purple and Gold Baby Shower


My sisters and I share an EXTREME joy of party-planning and whenever it's baby shower time (or a party of any sort)  in our family, we are more than happy to plan it! (that is such an understatement, its crazy) We all have our own pieces of inspiration and some how it comes together into a perfect blend. Although I would have to say it's my older sister Zhanna that makes chaos into chemistry. Without her, I'm sure this decor from the baby shower would not be posted! :) 

We threw this shower together for our baby sister. She's expecting her second girl any day now!


The decor was a mix of thrift store finds, some DIY and a few clearance purchases. The gold accent star was from Pier 1 Imports. Purple vase and Moroccan brass jar both thrifted. 


 This unbelievable find was from Goodwill: A genie bottle! Unfortunately the lid was lost so the Genie already escaped ;) But seriously, where would you find this?? Definitely not anywhere  for $2.50!


 A few details... (Gold candle sticks also a thrift store find)

For the table setting we used clear plates and DIY'ed some napkin "rings" using a paper cutter (from Michael's) and gold cardstock paper. The favor boxes were also handmade using this printable: http://www.donteatthepaste.com/2009/08/circle-dot-box.html


The favor boxes were different shades of purple and pink...


 Our DIY lanterns that turned out awfully crooked! :( It turned out to be a little harder than we thought but if you would like to give it a try, head over to:


This flower arrangement was made by my sister in law and she did an amazing job with the flowers we gave her! We used a metal flower pot (originally used for potted plants) and used it in an unexpected way. I love how it looked hanging above the dessert table...

 Can you believe this cake??? It was made by another sister in law and we were all blown away! It was scrumptious. It literally melted in your mouth...

 Trubachkee and our party favorite: Oreshki. Cookie nut filled with dulce de leche

We wanted the food to (somewhat) reflect the Mediterranean theme...

A beautiful salad brought by the showered mom's sister-in-law!  It was beautiful and an amazing blend of flavors!
 Chebureki! Fried Russian dough pouches holding juicy meat and onion.
 Chicken kabobs on mini sticks.
 Peppers filled with cream cheese and wrapped with bacon. A must-try!

 Some shots of the nights...

Had to post this one of my baby Em eating cake. :) She's adorable.

  
Our glowing sister!
 
 Me with my sisters. I can't wait to meet baby girl #2!

I hope these pictures inspire you for the next party you are planning- be it a bridal shower or a birthday party! Gold is very in and I see Moroccan inspired decor everywhere lately! :)And take advantage of thrift stores! You can find some really amazing pieces. If you find a great piece but its not the color you want, consider spray paint. It works wonders.  
(P.S. I can definitely see this being done for a boy party as well!)

Leave me your thoughts and thanks so much for reading!


Wednesday, September 19, 2012

The Last Days of Summer: White Chocolate and Raspberry Trifle

So I know fall is just around the corner but truth be told, you can enjoy this cake anytime of the year! Raspberries are best priced in the summer but this trifle is totally worth the splurge when they are not. It is so simple and it has a combination of flavors you will crave over and over again! I discovered this amazing indulgence when we went to Florida in the spring. All credit goes to my dear cousin who shared this recipe with us and gave me permission to post it! When we got home from the trip, I made it almost immediately! That's how addicting it is! 
 
That is the reason I am sharing it with you: because I love you and want you to get fat with me enjoy it too! :)


Ingredients:
1 (or 2) Sara Lee Frozen Pound Cake (Family Size)
Heavy whipping cream (16 oz, or more)
Cream cheese (8 oz)
1 cup sugar, divided
1 Lemon
Raspberries (big box or 2 small boxes)
White chocolate for top (optional)


That's it! Another great thing about this recipe? The pound cake is in your freezer when you need it unexpectedly or for a quick dessert. The vagueness in the measurements has to do with the what size trifle you are making. 


  • Beat the heavy whipping cream and 1/2 cup of the sugar on medhigh until a thick cream is formed. (not too thick that it breaks)

  • Put whipped cream into a separate bowl and than beat together cream cheese with the other 1/2 cup of sugar. 
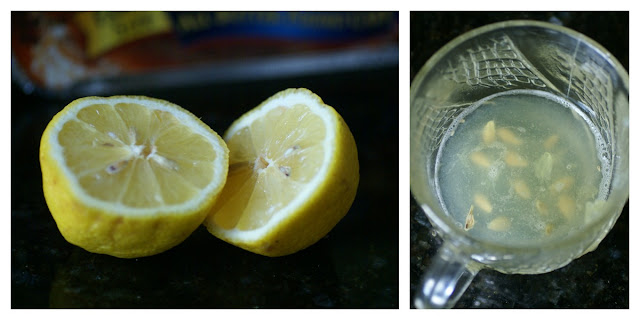
  • Squeeze a lemon of all its juice in a cup. Remove all seeds
  • Put both whipped cream and cream cheese mixture together in the mixer bowl and add the lemon juice. Beat until blended. 

  •  Use half the pound cake for the first layer. Cut the cake into cubes.
  • Put on the bottom of your trifle bowl (or any glass deep bowl will work). 
  • Use half the cream and cover the pound cake cubes.
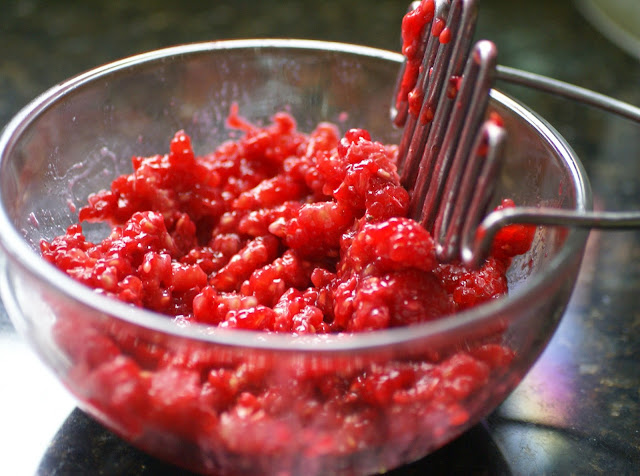
  • Mash the raspberries

  • Spread on top of cream
  • Cut up the rest of the pound cake and repeat the steps.

  •  Chop or grate some good quality white chocolate and sprinkle on top. I like it chopped in big chunks!


  •  Serve right away or chill in the fridge for a little and it's even better.
I only do two layers but it could be a major wow factor if you do more! That's the flexibility in the recipe. If you decide to do more layers or have a larger bowl, don't forget to beat more whipping cream so you have enough cream to cover the cake. 


I usually do 1 and 1/2 cakes for this size bowl but didn't in these pictures- so excuse how empty it looks! 

Now ENJOY! I am in love with the combo of the tangy raspberries with the chunks of white chocolate and indescribably pleasant cream. I'm just positive you will too.

Back to my usual stuff for the next post! Hope you have a wonderful day. Thank you for reading!

Saturday, September 15, 2012

Girly Peplum: DIY Shirt Refashion Tutorial

Why, Hello! I'm so happy to finally be able to post this shirt! I made this a week ago (or has two already flew by??) and have worn it an embarrassing number of times since! It's a simple change that has a huge impact!

I found the perfect body to work with at our local thrift. Note, it was a size 14. You will need a bigger size than you wear so you can resew the bottom for the peplum effect.


This fabric had an excellent stretch to it. I always enjoy working with this kind of fabric because it gives you a little leeway for mistakes.
  • First, measure where you want the peplum to start on your waist. It should be higher than your hips. I had a similar style shirt to get an example of where I wanted it to be.


  • Cut off the part you measured (plus an itch for resewing). Put aside. Don't throw away!

I cut out all my lining and it was a mistake. If you happen to have a lined shirt as well, I recommend cutting it in a straight line around the chest area so that you could skip a step!


  • I resewed my edges after cutting out the lining. A mistake and step I hope you can skip! It wasn't hard since the creases where already made.. Just time consuming. Sigh.
  • Measure the size for new arm holes by trying it on and seeing how tight you want the shirt. Mark and pin all the way down the shirt. (If applicable: Un-stitch the darts as much as possible to have a clean line down). You will probably need to make a slight diagonal line so that it is fitted on your waist
Tip: Sewing it down once and than cutting away access might help you pin it better the second time around. Don't get discouraged to resew or repin your shirt to perfection! Well, until you are happy with it! :)


  • Sew a long stitch along the cut edge of your bottom piece. DO NOT back-stitch. Tug gently on one end and push the fabric away from you. It should start to "ruffle" or gather. Do this half way and than start from the other side to do the other half. GENTLY tug. It can rip and you would need to resew the stitch.
 BONUS: No need to hem a refashioned shirt! Yay! :)

  •  Measure the ruffled bottom and move the ruffles wider or closer together until the line up with the width of your top.
  • Flip the ruffle inside out and lay it on top of your right side up shirt and pin around the edge. (As pictured)

  •  Sew around, removing pins as you go. :) Reinforce (sew over it twice) if you'd like to...

Your done! I have another way to make the peplum bottom without the ruffle technique so stay tuned for that in the near future. Either way, I adore it! It was worth the lining problems, the annoying darts and oh, yes, even worth sewing through my finger!! :)


TOTAL COST: $1.00 

I have lots to share with you! Another baby shower! It was beautiful. I CANNOT wait to post pictures for you to see! Until then, have a beautiful and blessed Sunday and try this refashion! Let me know if you do or what you thought about it.

Thanks so much for reading!

BTW, recognize the necklace? Its from my redo here!) 

I linked up on: http://merricksart.blogspot.com/ Check her out! She's got awesome refashions!!