Wednesday, December 11, 2013

The Purrfect Kitten (and Puppy) Party

Hello! I missed you guys!! (my virtual make believe friends) :)

I have been sorta busy over here- having a baby, nothing major ;) Just kidding of course! It is definitely the biggest news I can give! Praise God! She is a healthy happy little girl that we can't get enough of and we are so thankful to God for protecting her and bringing her into this world! We are blessed to have her to love. I am enjoying every minute of our new addition and still surprised over how fast the time goes by.

Whilst (yes, sounds cooler) I was still pregnant, I was planning an early birthday party for our daughter. It so happened that baby girl #2 wanted to be a week early and was born on that day instead! :) I am not complaining! We had a huge birthday cake that we got to enjoy on the birth day of our second girl instead :)

Anyways, long story short- We promised a kitten party for Em. I didn't get to throw her the party I had planned and envisioned. I am writing this post so YOU CAN throw the purrfect kitten party I wanted to ;) Really though, it's so I can stop thinking about it! Posting this makes me feel like all my research and planning will be of some use and maybe inspire one of you.


It all began when I got a great set of cupcake liners and toppers of cats and dogs at Target (on major clearance!) I knew I had to incorporate something for the boys (because we always invite family and that includes lots of cousins that are boys) so that's how this party became a kitten & puppy party. (the boys being the dogs) I also bought the plates and napkins from the same collection at Target and it definitely created the color theme and the whole look and feel of the party! 

My original idea was to make felt masks for the boys and girls of dog faces and cat faces. I found these two great tutorial and templates online!


http://www.thatslife.com.au/Article/Mums-Club/Real-Craft/How-to-make-a-dog-mask


http://imaginegnats.blogspot.com/2013/09/craft-handmade-costumes-cat-mask.html
But since this was a bit time consuming, the boys didn't get masks and the girls got cat ears instead! I enjoyed this much more and it was so simple to make! There are a bunch of tutorials online for this. All you need is:

Headbands (I got mine in a pack of 3 at the Dollar Store for $1) 
2 or more colors of felt (@ Michael's for about .30 a sheet!)
Needle and coordinating string

I used the same hand sewn back stitch technique I used for the leather hand stitched hearts.

I eye-balled the ear shape but this tutorial gives you an idea to get you started: http://nestfullofeggs.blogspot.com/2013/09/felt-cat-ears-tutorial.html

I wish I took pictures but its pretty self explanatory. I also hand stitched along the bottom of the ears so they hold better, like this:


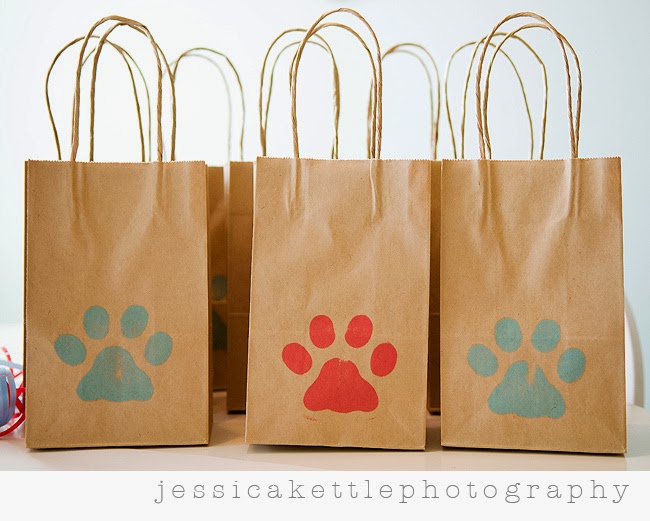
I added a paw print with a stamp and black ink to the table cloth to keep the table simplistic and not too busy. (stamp from Michael's)


The goodie bags were something I also got a chance to make before baby's arrival. The inspiration was from this site: http://www.myjuicecup.com/paper-party-cats-dogs-birthday/


This is adorable and simple too!
http://www.chickabug.com/blog/2012/11/puppy-party.html
If you don't want to do a favor, another GREAT idea I found was an "Adopt A Pet" Station. This is where you have stuffed kitten and puppy toys for your guests to pick out and take home. I thought this was so cute!! I am sure you can find great options at the thrift store too! (Make sure to give them a deep soak hot bath though!)

http://blog.hwtm.com/2013/05/cute-kitty-cat-party/

Decorate with balloons or Chinese lanterns made into cat faces like at this girl's birthday bash: 
http://blog.hwtm.com/2013/05/cute-kitty-cat-party/


Food is also a great way to incorporate the theme. I bought doggie and bone cookie cutters (also at Michael's!) and planned to make sugar cookies! Something like this:
http://www.chickabug.com/blog/2012/11/puppy-party.html
"Doggie Treats" were also on our menu. Just pretzel sticks dipped in white chocolate and topped with sprinkles. (These were delish!)
Don't forget the obvious: hot dogs! :)

Make strawberry milk for the kids too (since all kittens love milk). I found this ADORABLE inspiration picture:

Source Unknown :(


Lastly I wanted to share some game ideas I had thought up just in case your weather is permitting and you get to be outside! 

-Pin the tail (or bow) on a dog/cat picture while blindfolded. 

-Doggie Tag: The "dogs" chase after the "cats". You can make tails by attaching ribbon to the waist and have it be detachable with velcro (similar to flag football). The ones that are "it" have to pull off the tail to catch the cat or dog. It's nothing really but it's a great way to run off that sugar rush! 

-Ball Search: This would be very similar to Easter Egg Hunt but instead of plastic eggs, hide balls (maybe tennis balls) or plastic bones around the area and tell the dogs and cats to find their missing toys! The one with the most balls (or bones) wins a prize. 

Psstt- You could just use plastic eggs. Say they are balls. :) What kid doesn't love an egg hunt? 

If you are wondering where you would find bones, I have no answer :( Around halloween they sell a bag of bones and that would work perfectly! But otherwise, I scoured the web and didn't find any other source. 

And that's a wrap! Hope your kitten and/or doggy party turns out great!! I'd love to hear all about it. :)


Thursday, October 17, 2013

The Trouble with Dressing a Toddler (and an Oldie but Goodie Refashion)


I know you have seen this from me SO many times (from my first skinny tutorial, to my little guys pants remake) but I wanted to post these pictures mostly because she is just so stinkin' cute. :) 

What you don't see is the amount of coercing and bribing it took for her to put on these (now adorable) pants! She was adamantly against them for one reason: they weren't pink. Seriously. I begged her for days to wear them and finally asked that she wear them just for pictures and that she could change into pink pants right after I was done (secretly hoping she would forget). She agreed and she didn't forget. As soon as the "photo shoot" was done, she dropped them like they were hot. lol. I want to laugh at the silliness of her current "only pink pants" protest but I am hoping it's over soon. There are so much cute things in her closet just waiting to be worn... 


 (For a more detailed tutorial, see my first skinny refashion!)


It literally took me 10 minutes from start to finish (if not less!) Now if only she'd wear them before they get too short!

Are you anticipating the week winding down to the weekend as much as I am?? Have a great one...

Friday, September 27, 2013

DIY Fabric Streamer Tutorial (from fabric scraps!!)

Hi! 

I wanted to share with you how I made the fabric streamer for our cookie event because honestly, it was so easy to make and it is so versatile. It can be used anywhere, as home decor or for a shower or party backdrop! Throwing a visually beautiful party doesn't have to be expensive. Just takes a little DIY (and luck in the thrift stores) ;) The fabrics we used for the streamers was all thrifted (except the navy striped one- which was $1/yd at Walmart).


You will need:
  • A long thick ribbon (or a strip of material) to attach the fabric strips to
  • Fabric; complimentary mix of colors and patterns (and different textures too!) I used lots of scraps but I am guessing about 1/2-1 yard of each fabric. You can choose to have one more dominate pattern/color that will be the volume and less of the others.
  • Fabric scissors (or sharp scissors)
I began with cutting all the fabric in strips, cutting in the direction to make the strips as long as possible. The ones that ripped straight, I did that by starting with a straight scissor cut and pulling all the way down the rest of the fabric. I didn't use a ruler for the others. I just cut down as straight as I could. I liked the rough carefree look and honestly, you can barely tell that they aren't perfectly straight. But use a ruler for a more clean look (and if you're a perfectionist)! ;)


Loop the fabric around the ribbon by folding the strip in half and pulling the strip around the ribbon and through the hole you've created. (wow, that sounds confusing! But you know what I mean- see picture) 
Pull taunt. 


Continue with all the fabric, using as much as you want. Than you can move the strip up and down the ribbon without restraint and readjust how dense and close together you want the strips once you're done. Also, you can add strips later when you hang it and see where you want more color, etc.

I began looping the fabric the reverse way than I showed above, creating the loops to look backwards. It's not a huge deal- I later realized it didn't look as nice but from a distance its not noticeable. (I might fix it before I hang it up for baby... but, yea not likely :)


Ready to use for your decor needs!


TIP: Since I was using scraps of material, I didn't fold all the strips in half because they were short. I folded them 1/4 way so that it looked longer than it really was. This makes it thinner on the bottom too so I wouldn't recommend doing that for all the strips. 
 

Have a great weekend! Hope you are enjoying the cooler temps and the beginning of FALL!!! Thank you for reading!

Wednesday, September 25, 2013

Our First Oreshki Cookie Sale, at the Perennial Favorites Barn Sale!

Hello again! 

Like I said in my last post, we were thrilled with the results of our first ever cookie sale stand last Saturday! THANKS AGAIN to all that came out and bought cookies and were interested in our Russian nut shaped cookies! I promised pictures of our cookie stand and I honestly can't wait to share them. :) 

 The word "oreshki" means NUTS in Russian. This cookies was properly named, I would say! :)
DIY Fabric Streamer- Tutorial coming soon!


 Our seasonal Pumpkin Spice flavor did so well! It was a big hit.

DIY paper baggies for the cookies!
The "original" flavor, Dulce de Leche (Caramel)
 
Me and my beautiful sister! 
with my little helpers :)

We went with subtle hues and simple decor and we wanted to spend as little money as possible. Most of the things we already had. Somehow, it all just come together! I think we can all agree that the accent piece of the whole stand was the fabric streamer behind us?! The biggest surprise is how the color theme came into being: we found all the fabric scraps from the thrift store!! Yes, ALL (but the striped blue fabric) were left over scraps! (I will post a tutorial soon. It is super easy!! I think I will use it in my little girls room!)

The AMAZING chalkboard was made by my sister Tamara (the one pictured with me!) and her husband. The jars we bought at Walmart for a great price and all the rest were things we had accumulated from party planning, etc. My other sister, Zhanna held the cookie sale in another location (in Grottoes, for the Fall Festival) and did equally as well with the sale! Unfortunately, I don't have pictures of that stand!

If you couldn't see clearly from the pictures, the flavors we were selling were:
Dulce Caramel (Original Russian cookie filling)
Nutella
Peanut Butter & Jelly
Jam with a Nut Shell 
and our seasonal: Pumpkin Spice shell with Pumpkin Spice cream filling!

Which flavor do you think you would love most? Which do you most want to try??

Monday, September 23, 2013

Simple Jewelry Making : An Animal Pendant

You guys! We had so so much fun this weekend! Thanks to all that came out and supported us and the great events that were going on. We sold lots of cookies and heard great feedback! We are thrilled. :) I mean, we knew the Oreshki Cookies are amazingly delicious but to hear it said back to us really made our day! We also heard a great response to our flavors (especially the Nutella and Pumpkin Spice!) I can't wait to share pictures! Anyways, we are super excited over here and already brainstorming new winter flavors. (Also, hoping to open up shop in Etsy soon for all those that are reading from a distance!)


Today I wanted to share a simple satisfying little DIY. Satisfying because it only takes a few minutes, and you have a new piece to brighten up your wardrobe. On one of my many stops to Micheal's, preparing for the festival sale and barn sale, I spotted this cool (GOLD) lion pendant. I mean, he spoke to me (roared to me??) and I knew just what I was going to do with him. Come on, it was a GOLD LION HEAD. Did I mention he's gold??! :-D

All you need is 
Lion Pendant (Michael's also had a silver owl, a bird, and other fun pieces!)
Matching Chain
End clasp
Jewelry pliers (to attach the clasp)

Measure the length you want the necklace to be. (I made the necklace long enough to slip on and off without having to undo the clasp)

  Loop through the pendent. Attach the end clasps by prying open the last connections and re-closing onto the clasps ends.


Done! 

Despite my sister making fun of this necklace (I guess she doesn't speak Lion OR feel a certain attraction to gold), I LOVE it! :) 


Go rock it too.

On another note, how perfect for fall is this pleated plum color dress I thrifted?!? 

Hope you are enjoying the season change and are as excited as I am for sweaters and jackets! Thanks for reading!! 

(BTW, Michaels.com has coupons avaliable via your phone. They almost always have the 40% off a regular priced item (if not more!) Just show the coupon at the registry and you can get this cool pendant for $3!) 


Monday, September 16, 2013

Super Excited! Our BIG NEWS!!

HI!

So, I know I told you weeks ago (or months?!?! where did the time go?) about some big news that I couldn't wait to share with you.. News that was "in the works". Well, it never made more sense to tell you as it does now! My sisters and I decided to start baking and selling Oreshki Cookies! (Russian Nut Shaped Cookies) Although most of the Russian community ate this cookie all their lives, we wanted to expand our traditions (of yummy desserts) to everyone else! We also added our own spin to the cookies that we can't wait for you to try!

Why was this a secret?? It really wasn't. We just wanted the business name and logo to be perfect before getting it out there.  Since then, we have put aside the company name decisions, etc and are more focused on letting this amazing cookie be known! This "special occasion" cookie shouldn't be a rare occasion in your life. It should be eaten in celebration of life itself and for all the hard work that (I KNOW) you do! :)

My most exciting news is the events we have coming up! Saturday, September 21, 2013 we will be selling our cookies at two events! (What are the odds of that happening??) The Perennial Favorites Barn Sale in Bridgewater and the Grottoes Harvest Festival that happens to be scheduled on the same day! (Click on the name to see their page.)  Both events start at 9 am and we would love to see you! If you are local, you MUST come check them out! We are very excited and feel HONORED to be part of both of these events and I know they will be literally oooozing with talent and creativity! If you are in the area, you don't want to miss out on the incredible homemade and unique things that will be for sale there! Chance of a lifetime! (well, chance of the year, but basically the same thing!)

We did this photo shoot last year and we had so much fun! The kids really enjoyed it. The hardest part was getting enough shots before they ate all the cookies!


I wanted to add a special thanks to Amelia! She is one of the brains behind the Perennial Barn Sale and she is one incredibly talented lady!! If you have never seen her blog: http://amy-showalter.blogspot.com/ (or don't follow her on Instagram), you must. Her talent and eye for party/event planning is undeniable! I am so glad we have met :) You are an inspiration, Amelia! 

I will definitely be posting pictures of our events on Saturday! Until then, have a blessed week!

Monday, September 9, 2013

Hand Sewn Heart Elbow Patches out of Leather!

Happy Monday!!


As most of you know, Instagram is addiciting. Not only do you get to see beautiful imagery along with photography of people's travels and food, it is also very inspiring!! A fashion blogger I adore posted this picture a few weeks ago of this ASOS top and that is where this idea was born. Although the original isn't a bad price, I didn't think it was worth purchasing right now with my growing belly. But I easily recreated it!! You don't need a sewing machine for this one, you guys!

What you will need:

A long sleeve tee, preferably striped!
I found my long sleeve (striped) tee at Old Navy. You won't regret purchasing one because it's a classic look (at a great price!) that will never go out of style. Or maybe you have one you don't mind upgrading. 

Scrap pieces of leather (or pleather.)
I purchased an old outdated "leather" coat from a local thrift. It will provide material for lots more leather detailing for the future- which believe me, there will be. :) (A cotton would also do the trick!)

Heart Template
I used this one because I liked a longer sort of heart. You can download the template here: http://www.whiffofjoy.ch/media/digitalFreebies/HeartHangerTemplate_byKatharinaFrei.jpg

Needle, matching string

1. Try on your top and mark the placement of your elbow. I used a piece of tape to remember the placement. 
(Tip: make it a natural placement, without pulling down on the sleeve too much.)


2. Trace and cut out your hearts.


3. Place the heart where you want it and pin around. I used a small box lid to place in between the sleeve so that the hand sewing would be MUCH easier and makes the stitches much straighter and not bunch up. Find something to use, because it really makes a difference. (I wonder if there is something that sells specifically for this purpose? Seems there would be...) 


4. I used the backstitch method because it is the strongest. It was very easy and I used this video to refresh my memory. If you have never done it before, you could practice on a piece of fabric. 

5. That's it! Make sure you secure the last stitch and repeat steps for other elbow!


I love it! And it's a super comfy option that you can dress up or down! (One day I will wear it with my leather skirt! Until than, prego mama jeans it is. Haha) 

Have a wonderful week everyone! Thanks for reading.